


QGIS Altas – An Automated Way to Generate Multiple Maps
Introduction
Atlas is a collection of maps which depicts similar thematic concepts of different area and regions. Let’s say the field team is ready with GPS coordinates of the sampling locations along with their data entry system. To find those sampling locations easier and planning in collection routes, they need to have maps of sampling locations with common map components. That’s where the atlas comes into handy.
QGIS map composer tool we can create our own customized atlas maps based on different purposes. It’s really simple here!
Before generating your atlas you should have finished setting all the required map components dealt in our previous blogs. To create an atlas you have to go to the “Atlas Generation” tab and select the button

Image 1: Atlas Generation tab in the print composer

Image 2: Atlas Generation tab in detail
In the Atlas tab, you can see the option “Coverage layer”. Atlas is the collection of maps with similar information right? So we have to choose which layer should be targeted in the atlas maps, in our case “zones” layer. Then the “Page name” option enables you to choose the attribute column which would get updated in the atlas to the dynamically changing information. You can even perform some expressions based selection of records to be shown in the atlas by selecting 
After atlas settings are done, you have to move to the “Item properties” of the map where you need to see the dynamic changing of locations, in our case “Map 0”. Scroll down and select the option

Image 3: Setting the target map for the atlas process
Auto-title Updation


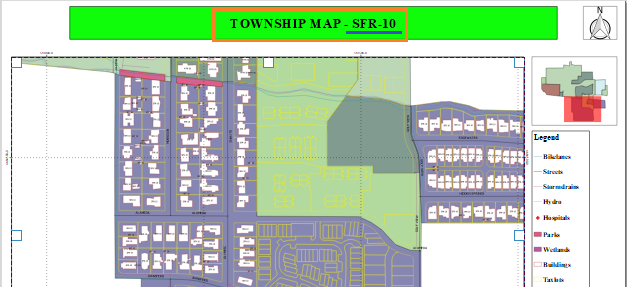
Image 4: Example of Auto-title Updation in Atlas
Atlas is an efficient tool to generate a large number of maps with similar template settings for different regions but it would be very much helpful if the title text also changes dynamically. Well yes, we can change the title text dynamically in accordance to the coverage layer attributes field. This would enhance the printed maps efficiency and make them self explanatory to the users.
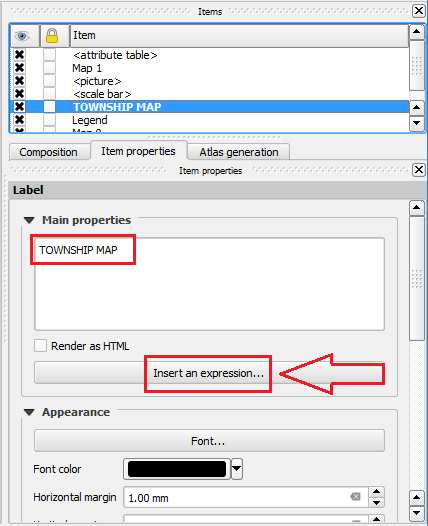
Image 5: Procedure for setting dynamic title text
To update the title text dynamically, Go to “Item properties” of your title label. In the main properties box type your common prefix or suffix. Then click the option “Insert an expression” below and a query window will pop-up.
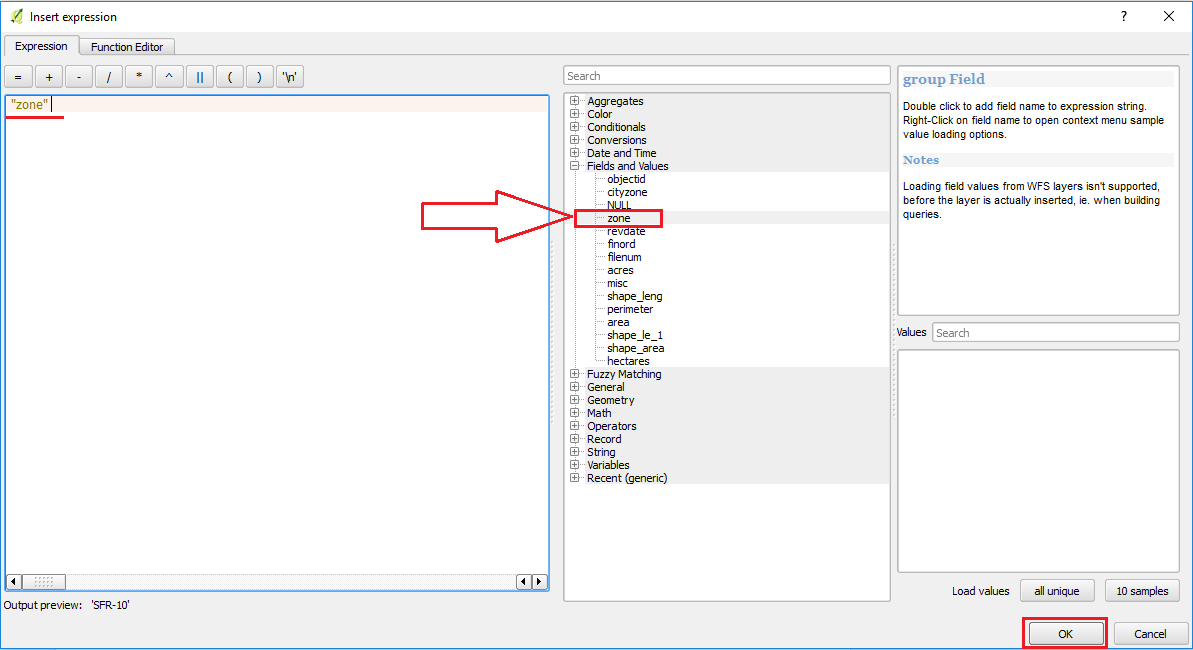
Image 6: Selecting the attribute field for dynamic title text
In the query window, you could see “Fields and Values” in the drop down menu. You can choose any field or fields which suits for your maps. Here we have chosen the field “zone” as the coverage layers are showing the zone areas. After selecting your field click “OK” in the right bottom.

Image 7: After setting the attribute field for a dynamic title
You could see that in “main properties” box the title text gets updated as “TOWNSHIP MAP – [%“ zone”%]”. Now in the atlas maps, the title for each page would dynamically get updated as coverage layers respectively. Or else you can type the syntax – “ [%“ zone”%] ” in main properties box manually also, if you are familiar with the field to be used.
Note
You can check the resulted atlas using “preview atlas” option 

Image 8: Overview map indicators changing dynamically as per coverage layer

Image 9: Sample page of the atlas maps generated in our data
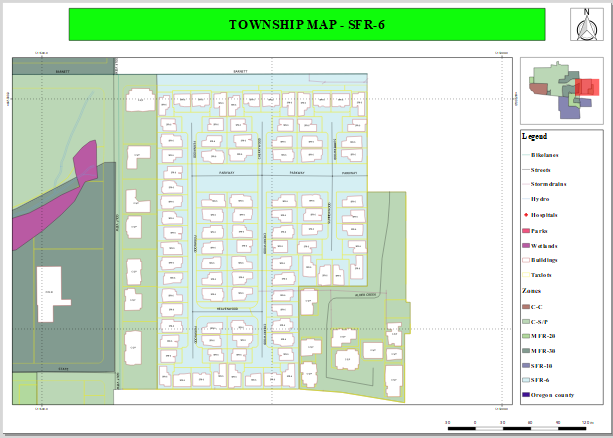
Image 10: Sample page of the atlas maps generated in our data
The generated atlas can be exported in formats like PDF, JPEG, or SVGs files.
Try these steps by downloading the latest QGIS from https://qgis.org/en/site/forusers/download.html
Sample data used can be downloaded from https://qgis.org/downloads/data/
Leave a comment